Recently my LinkedIn network mentioned a very nice library of human avatars: https://www.humaaans.com/ While this is an excellent tool and I was playing with this idea myself in the past, an average instructional designer, particularly in corporate, does not usually work on a Mac. And the files that are included in the Humaaans library can be opened in Sketch (a Mac-only program) or InVision Studio (which is also currently available only for Mac, although a Windows version will be coming sometime in the future).
So, what can an average Windows-PC wielding instructional designer do? How can we lay our hands on this goodness?
The answer is simple and quite unexpected. Get yourself Figma. Figma is a free (for individuals) browser-based prototyping tool that I've used extensively for my UX Designer course and fell in love with. The learning curve can be quite steep if you learn it from scratch, I have to be honest, but it is definitely worth it. If you want to jump on the whole "I'm a learning experience designer" bandwagon and you can learn only one UX-related tool, then go for Figma.
My romance with Figma aside, in this case it has one undeniable benefit. It can open Sketch files and it can export your creations as PNGs. Make that two benefits. And here's how to reap them.
Set up
First, set everything up in 6 easy steps:- Register with Figma.
- Download the .sketch file from Humaaans.com
- Open Figma
- Import the .sketch file
- Ignore any concerns about missing fonts.
Basic modifications
With the file open, select any of the humans, for example, in the "Basic" frame.
If you click around, you'll notice that each human consists of fours parts:
- head
- body
- legs
- shoes
Go ahead and click on any of these four parts, for example, a head. Then, take a look at the right-hand panel. You'll notice an "Instance" dropdown in it.
Click on this dropdown and you will see all the different heads that you can use on this model. Pick a head and it will automatically replace the current style. Same will work for other components, such as body, legs and shoes. Note that each shoe will have to be selected separately.
So, playing around with the component instances, you can immediately create a slightly different scene than the one we've started with:
With this knowledge unlocked, you can modify any of the models/compositions already included in the file, so try it out.
Rotating things
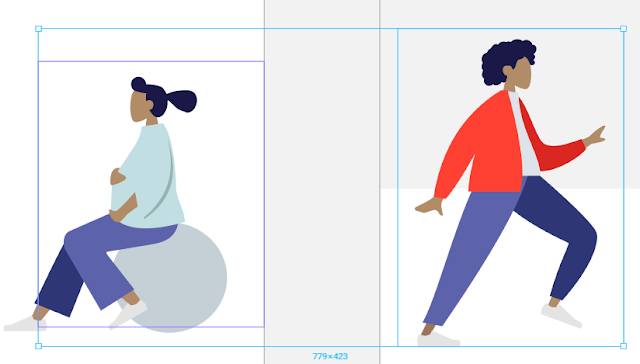
If so far you've been working with objects in the Basic frame you may notice that although you can rotate the complete humans, you can't move, rotate or resize heads or legs. This is because these two guys are components themselves. So their heads, legs etc. are components within components. Unfortunately, anything anything that is contained within components cannot be moved or resized in Figma. But do not despair! If you look at the frame "Separated components", you'll see that the humans in there are groups of components.
 |
| Component on the left (note the purple frame) and a group on the right (not the blue frame). |
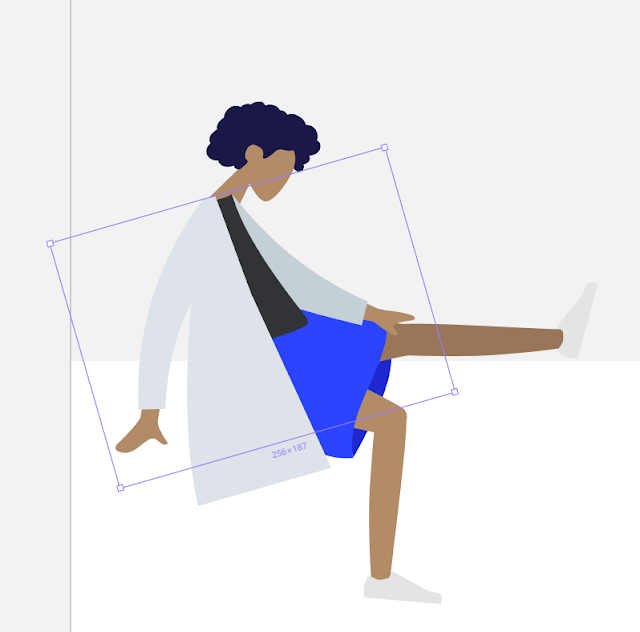
On the image above the character in the red jacket is a group of separate components and therefore can be rotated and resized as you wish. For example, like this:
 |
| Rotating components |
You may, however make more advanced changes, like moving legs and arms separately. For example, maybe we don't like this sad doctor sitting rubbing her knee, we want her to strike a flying hero pose.
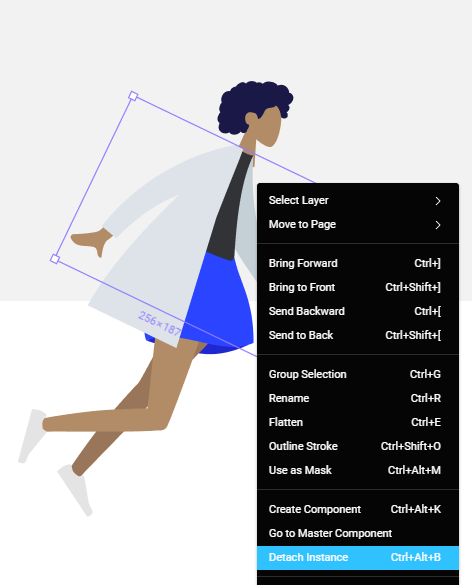
As you remember, I mentioned that anything within components cannot be resized or repositioned. So, since sleeves and hands are element of the "body/jacket" component, you can't resize them unless you break your component into separate objects. The consequence of this action is that you will lose the ability to "switch appearances" by selecting component instances (as the component will cease to exist). So, if you made up your mind about the character's clothing and are ready to move her arms and legs, select the component you want to modify, right-click and choose "detach instance":
 |
| The component will be broken into pieces it's made of. |
Note: at the moment Figma doesn't do this procedure well, so once you've clicked "detach instance", you should press Shift-Ctrl-G on the keyboard to get a proper set of separate objects. With this done, feel free to move and rotate them as you wish. You can also group objects (such as arms and hands) with Ctrl+G to rotate them together.
 |
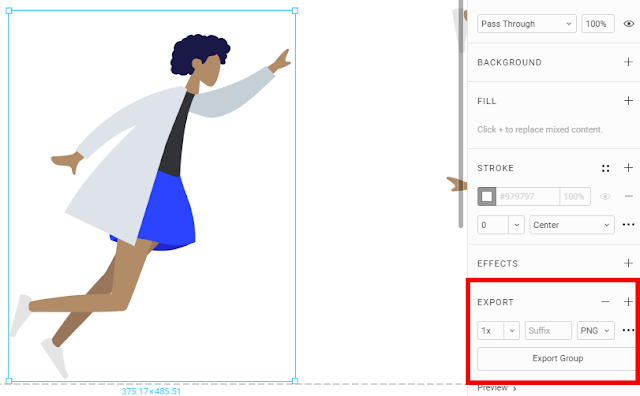
| Striking a pose |
Exporting
You can export your creations as PNG, SVG or JPG. To do this, select all elements you want on your picture and group them together. Then, in the right-hand panel, find Export menu. There, click +, adjust export settings as you need and click "Export Group".


No comments:
Post a Comment